
There are a ton of complicated mechanics and strategies in Counter-Strike: Global Offensive, and some of them require a few extra steps in order to be executed. Throwing grenades from unsuspecting angles is a great example of such.
Sometimes, however, just chucking a smoke grenade or molotov cocktail at the ground isn’t enough. To nail those fancy tosses, players will have to perform a jump throw, which isn’t as simple as it sounds. Luckily, there’s a way to make things a lot easier.
How do you bind jump throw in CS:GO?
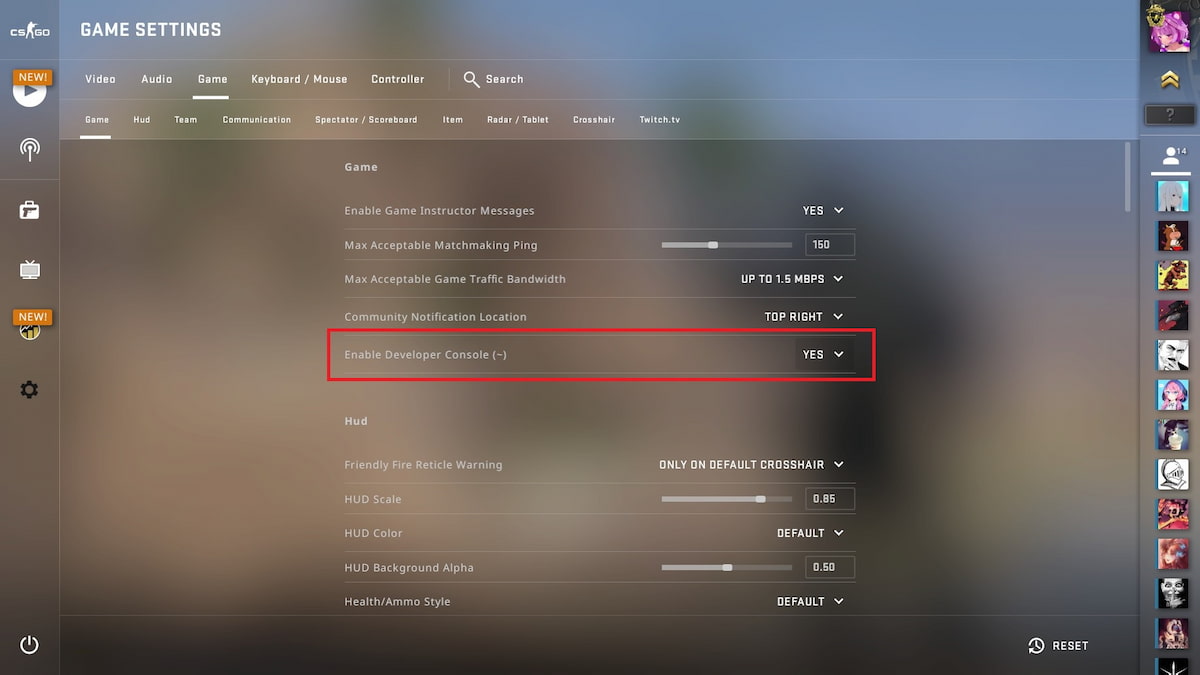
First of all, the developer console needs to be enabled before Jump Throw can be bound. To do this, head on over to the game’s Options menu and look for the Developer Console under the Game Settings tab. Once all of that is done, open the console by pressing the tilde (~) key, then copy-paste the following command line (without the quotation marks) to bind a Jump Throw to a button:
- “bind <any key> +jump; -attack; -attack2 -jump”
To use the key bind, pull the pin off a grenade first with either LMB or RMB, then press the bound button. The game will automatically execute both jump and attack commands, resulting in a perfect toss. It’s important to note that binding Jump Throw to a key is legal in almost all cases, and even the game’s elite players use it in their matches. VAC bans won’t be issued against anyone who uses commands like this in casual and competitive matches, but when playing in scrims or tournaments, make sure to ask the organizers first.
The game should remember this key binding and keep it as-is for future sessions unless players decide to bind their Jump Throw button to some other action. In case it does get forgotten or overwritten, simply input the code again via the same method. Alternatively, players can create an autoexec file that, as its name implies, automatically executes console commands written inside it.
How to create an autoexec file
- Go to the /csgo/cfg/ folder in the game’s installation directory.
- Create a text file named “autoexec”.
- Paste all desired commands into the file.
- Save autoexec.txt as autoexec.cfg.
- Right-click CS:GO on Steam and open the Properties menu.
- In the Launch Options textbox, write “+exec autoexec.cfg” then click OK.
This will remove the need to copy and paste commands into the developer console every time the game is booted up. This works for every console command provided that players have the necessary permissions in the game lobby. Simple scripts, like the ones for key bindings and crosshair settings, can all be activated via autoexec.cfg files. Just keep in mind that cheats and admin-level commands are only available in private lobbies.


Published: Feb 16, 2023 07:21 pm